Best Smart Thermostats to Buy in July 2026
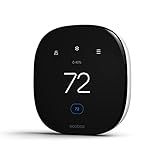
ecobee Smart Thermostat Essential - Energy Star Certified programmable Wi-Fi Thermostat - Works with Siri, Alexa, and Google Assistant
-
SAVE UP TO 23% YEARLY ON HEATING/COOLING COSTS WITH SMART SCHEDULING!
-
COMPATIBLE WITH 85% OF SYSTEMS-CHECK YOURS EASILY ONLINE TODAY!
-
CONTROL TEMPERATURE VIA TOUCHSCREEN OR APP; ENJOY FREE UPGRADES!


Amazon Smart Thermostat – Save money and energy - Works with Alexa and Ring - C-wire required
- SMART UPGRADES SAVE ENERGY AND REDUCE YOUR BILLS EFFORTLESSLY.
- CREATE COMFORT ZONES WITH AUTOMATIC HEATING AND COOLING ADJUSTMENTS.
- ENJOY EASY INSTALLATION AND RELIABLE TECH FROM HONEYWELL’S EXPERTISE.
Google Nest Thermostat - Smart Thermostat for Home - Programmable Wifi Thermostat - Snow
-
SAVE ENERGY EFFORTLESSLY WITH SMART SCHEDULING VIA THE GOOGLE HOME APP.
-
REMOTE CONTROL ACCESS LETS YOU MANAGE COMFORT ANYTIME, ANYWHERE.
-
HVAC MONITORING ALERTS YOU TO SYSTEM ISSUES FOR EASY MAINTENANCE.
ecobee Smart Thermostat Enhanced - Programmable Wifi Thermostat - Works with Siri, Alexa, Google Assistant - Energy Star Certified - Smart Home
- SAVE UP TO 26% ON ENERGY COSTS WITH SMART TEMPERATURE ADJUSTMENTS!
- PERFECT TEMPERATURE AWAITS YOU-PREHEATS/COOLS BEFORE YOU ARRIVE.
- CONTROL VIA APP; EASY INSTALLATION EVEN WITHOUT A C-WIRE!
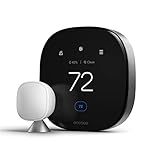
ecobee Smart Thermostat Premium with Smart Sensor and Air Quality Monitor - Programmable Wifi Thermostat - Works with Siri, Alexa, Google Assistant
- SAVE UP TO 26% YEARLY ON HEATING/COOLING WITH ENERGY STAR EFFICIENCY.
- SMARTSENSOR TECHNOLOGY TARGETS COMFORT IN KEY ROOMS, REDUCING HOT SPOTS.
- CONTROL VIA VOICE WITH BUILT-IN SMART SPEAKER; INCLUDES SIRI/ALEXA.
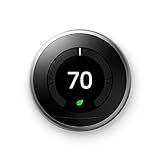
Google Nest Learning Thermostat - 3rd Gen (2015) - Programmable Smart Thermostat for Home - Works with Alexa - Stainless Steel
-
AUTO-SCHEDULE: THERMOSTAT LEARNS YOUR HABITS, PROGRAMS ITSELF!
-
HOME/AWAY ASSIST: SAVE ENERGY BY COOLING/HEATING ONLY WHEN NEEDED.
-
REMOTE CONTROL: ADJUST SETTINGS ANYTIME, ANYWHERE WITH THE NEST APP.
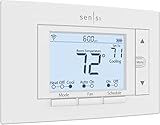
Sensi Smart Thermostat, 100 Years Of Expertise, Wi-Fi, Data Privacy, Programmable, Easy DIY Install, Works With Alexa, Energy Star Certified, Mobile App, ST55
-
PROTECT YOUR PRIVACY: SENSI NEVER SELLS YOUR PERSONAL INFO!
-
EFFORTLESS INSTALLATION: QUICK DIY SETUP WITH INTUITIVE APP GUIDANCE.
-
SAVE ENERGY & MONEY: CUT HVAC COSTS BY UP TO 23% WITH SENSI SMART FEATURES!
Installing a smart thermostat is a fairly simple process that can be completed by following a few steps. Here's a general outline of how to install a smart thermostat:
- Turn off the Power: Before beginning any electrical work, turn off the power to your heating and cooling system at the breaker box. This will ensure your safety during installation.
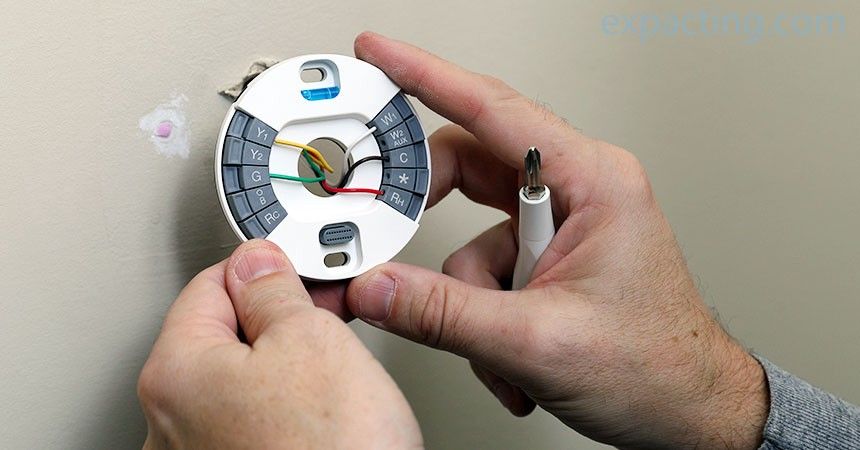
- Remove the Old Thermostat: Take off the cover of your existing thermostat and unscrew it from the wall. Carefully disconnect the wires connected to the thermostat, making note of their corresponding terminals. Labeling the wires can make it easier when connecting them to the new thermostat later on.
- Check Compatibility: Ensure that your new smart thermostat is compatible with your heating and cooling system. Most manufacturers provide compatibility information on their websites or packaging. If you're unsure, consult a professional or contact the manufacturer for assistance.
- Mount the Backplate: Attach the backplate of your smart thermostat to the wall using screws and a screwdriver. Ensure that it is level and securely mounted.
- Connect the Wires: Take the wires from your heating and cooling system and connect them to the corresponding terminals on the backplate of your smart thermostat. Refer to the labeling of the wires and the instructions provided by the manufacturer to ensure proper connections.
- Attach the Thermostat: Once the wires are securely connected, carefully attach the smart thermostat to the backplate. Ensure that it snaps into place or is screwed on as per the manufacturer's instructions.
- Restore Power: Turn the power back on at the breaker box to your heating and cooling system.
- Configure the Settings: Follow the manufacturer's instructions to configure the settings on your smart thermostat. This may involve connecting it to your home's Wi-Fi network and downloading any necessary smartphone apps.
- Test and Set Schedules: Test your smart thermostat to see if it's working correctly. Set your desired heating and cooling schedules to utilize the smart features and optimize energy efficiency.
That's it! Your smart thermostat should now be successfully installed and ready to use. However, note that these steps can vary slightly depending on the specific brand and model of your smart thermostat, so it's always a good idea to refer to the manufacturer's instructions for accurate installation guidance.
Should I turn off the heating/cooling system during installation?
It is generally recommended to turn off the heating/cooling system during installation or any kind of maintenance work. This is done to avoid any potential accidents, to ensure the safety of the installers, and to prevent any damage that may occur to the system during the installation process. However, it is always best to consult with a professional HVAC technician or follow the specific instructions provided by the manufacturer for your particular system.
What are the steps involved in installing a smart thermostat?
The steps involved in installing a smart thermostat typically include:
- Choose a compatible thermostat: Research and select a smart thermostat model that is compatible with your heating and cooling system. Check the manufacturer's website or consult a professional if you are unsure.
- Turn off power: Turn off the power supply to your heating and cooling system at the circuit breaker to ensure safety while working with electrical components.
- Remove the old thermostat: Remove the cover of your existing thermostat and carefully disconnect the wires. Take note of the wire labels or take a picture to remember the correct connections.
- Mount the smart thermostat: Use the provided mounting bracket and screws to secure the smart thermostat to your wall. Make sure it is level and properly aligned.
- Connect the wires: Take each wire from the old thermostat and connect it to the corresponding terminal on the smart thermostat. Refer to the installation manual or wiring diagram for proper guidance.
- Attach the backplate: Align the smart thermostat's backplate with the mounting bracket and snap it into place. Make sure all the wires are properly seated within the backplate.
- Restore power: Turn the power supply back on at the circuit breaker and wait for the smart thermostat to initialize. Follow the instructions on the thermostat's display to complete the setup process.
- Configure the thermostat: Use the smart thermostat's app or on-screen settings to input your desired temperature preferences, program schedules, and any additional features you wish to activate. Connect the thermostat to your home's Wi-Fi network if necessary.
- Test and adjust: Test the smart thermostat by adjusting the temperature settings and observing if it properly controls your heating and cooling system. Make any necessary adjustments or troubleshoot issues as per the manufacturer's instructions.
Note: It is always recommended to refer to the specific installation instructions provided by the manufacturer of your smart thermostat for accurate and detailed guidance. Additionally, if you are uncomfortable or unsure of any step, it is advisable to consult a professional HVAC technician for assistance.
How often should I clean or maintain the smart thermostat?
The frequency of cleaning and maintenance for a smart thermostat may vary depending on various factors such as environmental conditions and usage. However, here are some general guidelines:
- Check the thermostat regularly: Look for any dust or debris accumulation on the surface of the thermostat, vents, or buttons. If you notice any buildup, it's time for cleaning.
- Clean the thermostat exterior: Use a soft, dry cloth to wipe the surface of the thermostat and remove any dust or smudges. Avoid using abrasive or chemical cleaners, as they can damage the device.
- Clear the vents: Regularly check the vents of the thermostat and make sure they are clean and free from any obstructions. Use a small brush or a vacuum cleaner to remove any dust or debris.
- Test and calibrate sensors: Occasionally, verify the accuracy of the temperature and occupancy sensors of the thermostat. You can do this by comparing the thermostat's readings to a separate thermometer or by observing how it responds to changes in room temperature. If the readings are consistently inaccurate, consider recalibrating or contacting the manufacturer for assistance.
- Update firmware: Smart thermostats often receive software updates to enhance their performance or add new features. Check for any available firmware updates from the manufacturer and install them as recommended.
Remember to consult the user manual provided by the thermostat manufacturer for specific instructions regarding cleaning and maintenance, as different models may have varying requirements.